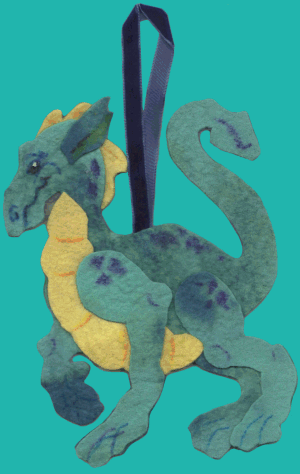
The Dragon Ornament©
Jennifer Dragon Craft Project
This fun project comes to you from the
Dragon Charmer, Jennifer Carson who makes wonderful hand dyed wool felt dragons and other fantasy creatures.
There are two parts, first dyeing the wool, and then making the dragon. If you are using colored felt or colored paper you can skip to the second part. You should know, making your own colors is lots of fun and a little messy, just the things we really love! Follow the links to below to the right section.
Instructions for Dyeing Wool Felt
Directions for making the Dragon Ornament©
Jennifer's Instructions for Dyeing Wool Felt with Kool Aid
Ingredients
Kool Aid (un-sweetened in what ever colors you want)
Natural undyed wool felt
Hot water
A pan and cups
An oven
Heat enough hot water to presoak the felt in a flat container and fill as many cups
as you want for dye colors.
1. Fill a flat container with hot water and soak the wool felt for 5 minutes. Be careful!
2. While the wool is soaking pour the remaining hot water into 8 Oz. cups.
The more Kool Aid you put into the cup the more vibrant the color will end up,
the more water you have, the softer the color will be. Stir to dissolve.
Add 1 Tablespoon of vinegar to each cup. Be sure to use Non-sweetened Kool Aid
3. After your 5 minutes are up squeeze any excess water from the felt and place
in an oven proof pan. You can use a roller or towel to help remove the water.
Now pour the color mixtures over the felt in spots and let the colors bleed together.
You can also sprinkle the dry crystals on the felt and rub them into the wool.
If the spots get too bright just add a little water. You might use a contrasting color
for the tummy and head spike.
4. Cover the pan with aluminum foil and "cook" for one hour in the oven at 300 degrees,
remove and let cool.
5. After the felt is cooked, rinse it in cool water and put in the washer
on the spin cycle only. Then you can dry it in the dryer. If you find the felt
sticks together just pull it apart.
Have an adult iron it lightly on the wool steam setting to remove any wrinkles
you do not want, or press heavily to flatten the felt.
The Wool Felt is ready to make the Dragon.
![]()
Jennifer's Directions for making the Dragon Ornament©
Materials
Felt: This pattern will work with home dyed felt or any colored wool or
colored synthetic wool, (or you could even use colored paper.)
Scissors
Fabric glue (or paper glue)
Felt tip pen
Double back tape (optional)
Ribbon for hanging
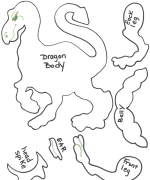
1. Print the pattern page on card stock or trace the pattern pieces onto heavy paper,
like an empty cereal box or file folder.
2. Cut these pieces out and trace them again on your pieces of felt using a felt tip marker.
You will want to trace the head spike and tummy out of a contrasting colored felt.
You can use double sided tape to stick the pattern to the felt for easy cutting.
3. Cut your felt pieces out.
4. Line up the tummy piece to its position on the body, attach with fabric glue.
5. Line up the legs onto their position on the body, attach with fabric glue.
6. Line up the head spikes, glue onto the back of the head with fabric glue.
Now attach the ear to the front of the head.
7. Turn the dragon over and glue a piece of ribbon or cord onto the back
so your ornament can hang.
8. Next glue your whole dragon onto another piece of felt and let the glue dry.
This layer will stiffen the ornament and make it hang nicely.
9. When the glue is dry you can cut around the dragon again. Use fabric markers
or paint to draw in the details of your dragons face and claws.
10. Hang and enjoy!
Jennifer Dragon
Printable Page
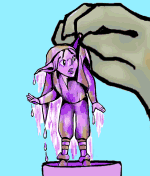
Phee's Comic Strip
![]()